 ©
©
|
©
|
|
Previous: Benchtesting and motherboard-assembly installation With the motherboard, CD-ROM drive and floppy drive now in place, I'll pull out the hard-drive rack and bolt the hard drive into it. On this case, it comes out sideways after undoing a thumbscrew at the bottom and pushing down on the chromed release at the top. This will vary depending on the case you got, so adapt and overcome. 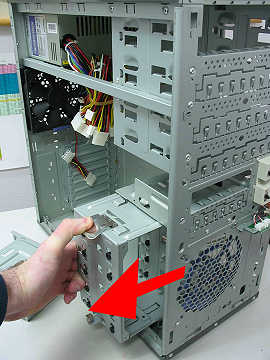 Concept break! Since this guide is aimed at the first-timer, I'm going to emphasize that hard drives are physically delicate, and very sensitive to electric shock. Don't bang them around or shock them. Here you see the hard drive lying on top of an anti-static bag, which is on top of soft foam. This is how they deserve to be treated. Remember... before and during the handling of the hard drive, touch a grounded object (such as the plugged-in computer case) whenever possible, to avoid building up a static charge. 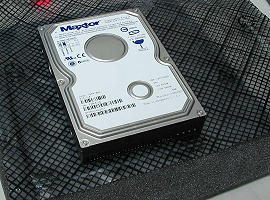 If you have a Serial ATA (SATA) hard drive... SATA drive/controller info page The drive's label shows the jumper settings. This computer will have the hard drive by itself on its own cable, and since it has no Single-Drive option, I'm going to leave this drive set to Master. If you get a Western Digital or any other drive that has a "Single-Drive" jumper option, and it IS going to be alone on its own data cable, then do use the Single-Drive setting. 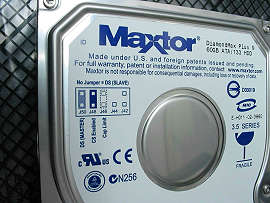 Here's the rear of the hard drive. From left to right, we've got
 This case has nifty rubber donuts for the hard-drive mounting screws to go through, and some special screws to match. Put in four screws, snug them gently-firm... 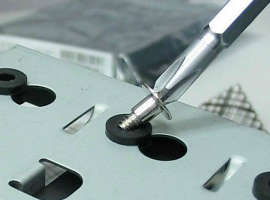 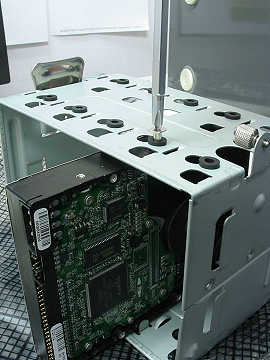 ...and slide the hard drive rack back into place very carefully. Don't lose track of that baggie of screws, since they aren't generic ones. 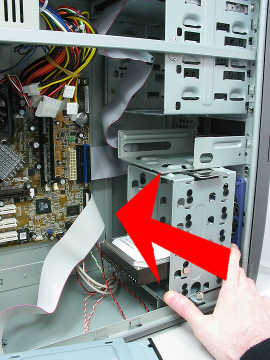 Next: Final connections (case wiring, drives and power supply)! |